12 3D Wall Art Ideas for Decorators: UV Blacklight Tips & Scale Rules
Three-dimensional wall art uses depth, shadow, and sometimes light to turn a flat wall into an architectural feature rather than decoration you hang and forget. It spans everything from folded paper relief you can build in an afternoon to resin sculptures cast by a studio, and this guide covers 12 ideas, the materials worth knowing, sizing and mounting rules, five beginner DIY projects, and lighting notes, including how UV-reactive pop art from a studio like Facundo Yebne’s FLY Miami Art behaves under blacklight versus daylight.
TL;DR:
- The best wall art combines proper scale, angled lighting, and strategic placement to maximize depth and shadow effects.
- UV-reactive blacklight pieces function as dual artworks, revealing hidden patterns at night when lit with dedicated blacklight fixtures.
- Lightweight materials like foam, paper, and composites suit rental walls, while resin and metal are better for gallery-quality, permanent installations.
- Planning and communication are crucial when commissioning glow art, especially regarding room lighting, size, and desired glow intensity.
- Off-the-shelf LED and glass panels are quick to acquire, but custom pieces, particularly UV art, require longer lead times and detailed specifications.
Table of Contents
- 12 Dimensional Wall Art Ideas Worth Trying
- Choosing Materials: Resin, Wood, Metal, Plaster, and More
- Sizing and Placing 3D Wall Art the Right Way
- Five Weekend-Friendly DIY 3D Wall Art Projects
- Lighting and Finish Tips for Depth That Actually Reads
- Mounting, Weight Limits, and Everyday Maintenance
- A Studio’s View on Commissioning Glow Art
- Where to Buy or Commission 3D Wall Art
- What Actually Matters When You’re Choosing 3D Wall Art
- Bring Studio-Grade Glow Art Into Your Own Space
- Sources
12 Dimensional Wall Art Ideas Worth Trying
Not every idea here needs a saw or a resin kit. Some take an afternoon; others are worth commissioning. Here’s the range, sorted roughly from easiest to most involved.
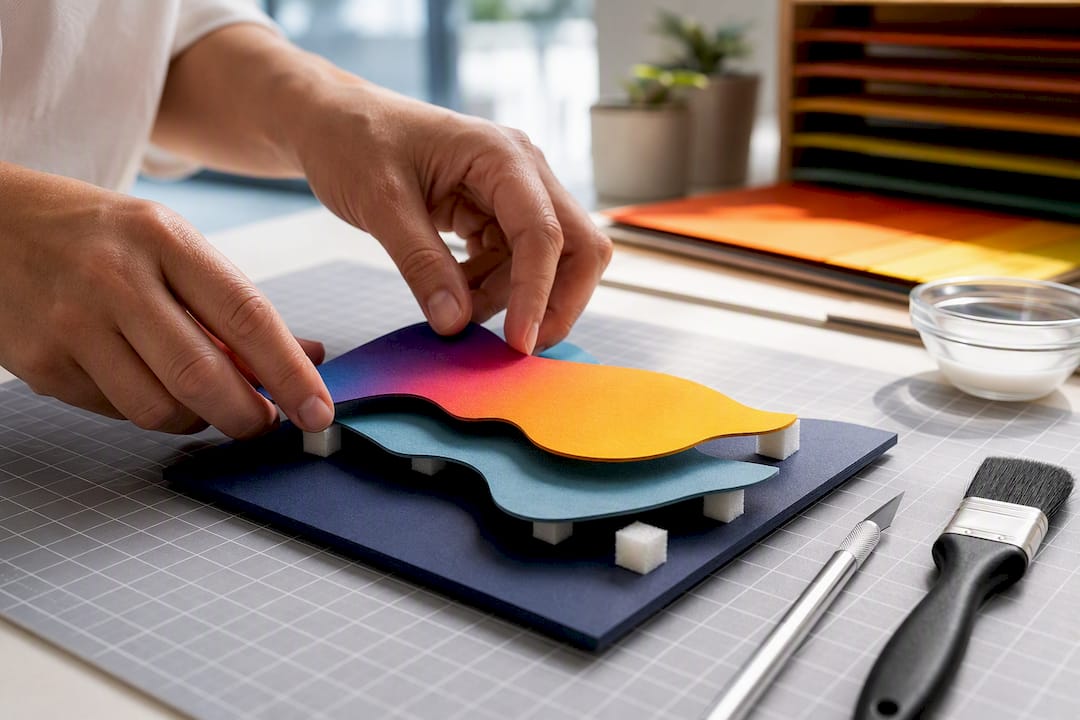
1. Layered paper relief panels. Cut geometric or botanical shapes from cardstock, stack them with foam spacers, and frame the whole thing. Beginner difficulty. Works in bedrooms and hallways. Tip: seal with a matte fixative to prevent yellowing.
2. Foam-core geometric tiles. Modular hexagons or triangles painted and arranged in a pattern. Beginner. Great for rental walls since tiles use lightweight adhesive strips instead of anchors.
3. Layered wood panels. CNC-cut or hand-jigsawed wood shapes stacked in relief, often stained in gradients. Intermediate. Suits living rooms and studies. Mount with a French cleat for even weight distribution.
4. Resin relief canvas. Poured resin over textured molds creates a glassy, dimensional surface. Intermediate to advanced because of ventilation and cure-time requirements. Reads best under angled light.
5. Metal sculpture panels. Welded or laser-cut metal, often finished in matte black or patina. Advanced, usually a commissioned piece. Anchor into studs, not drywall alone.
6. Carved plaster reliefs. Hand-carved or mold-cast plaster gives a classical, almost architectural texture. Advanced. Best in entries or dining rooms with strong ambient light to catch shadow lines.
7. LED-backlit panels. Cut or printed designs mounted over integrated LED strips for a glow effect. Intermediate; most are sold as finished ready-to-mount pieces with household-rated fixtures already installed.
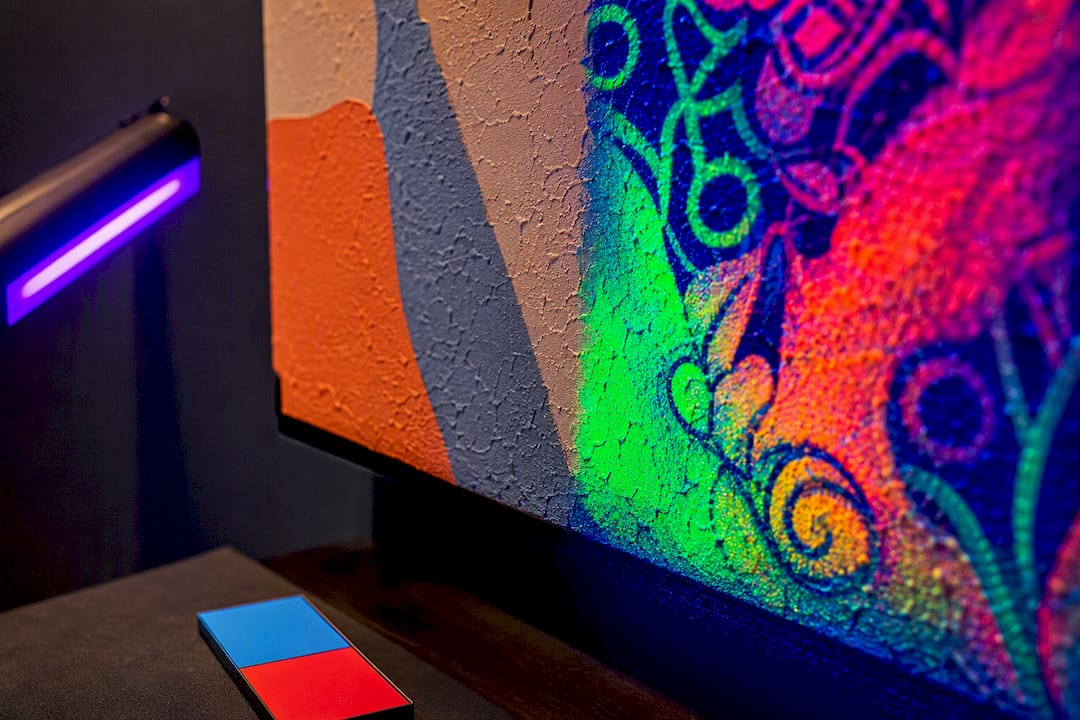
8. UV/blacklight-reactive pop art. Fluorescent pigments hidden under daylight colors reveal a second image or pattern under blacklight. This is where studio work like FLY Miami Art’s wall art collection stands apart from typical decor. Best as a statement piece with dedicated lighting.
9. Upcycled mixed-media collage. Combines fabric, found metal, and paper for texture without a big budget. Beginner to intermediate.
10. Acoustic 3D panels. Modular foam or felt panels that double as sound dampening, popular in apartments where noise control matters as much as looks, a trend gaining traction among urban renters.
11. Driftwood or found-object assemblage. Organic, textural, and ideal for coastal or bohemian rooms. Beginner, low cost.
12. Glass-printed UV panels. High-gloss tempered glass with printed depth layers, sold as framed, ready-to-hang pieces. Statement piece for entries or over consoles.
Choosing Materials: Resin, Wood, Metal, Plaster, and More
The material you pick decides how heavy the piece is, how it holds up over time, and how much shadow it throws. A few guidelines:
- Resin and acrylic composites deliver serious visual weight without the actual weight. Buyer’s guides confirm that engineered resins can mimic stone’s presence at a fraction of the load, which matters for interior stud walls.
- Wood offers warmth and is forgiving for DIY cutting, but it needs sealing in humid rooms like bathrooms.
- Metal is durable and modern but almost always requires professional welding or laser fabrication for anything beyond small accent pieces.
- Plaster carves beautifully and holds fine detail, though it’s brittle and heavy, so it’s rarely a good fit for apartment walls.
- 3D printing works for intricate, repeatable geometric forms and is increasingly used for prototyping custom commission designs before casting in resin or metal.
- Mixed media (paper, fabric, found objects) is the cheapest entry point and the most forgiving for a first attempt.
For rental or apartment walls, lean composite and lightweight. For a gallery-grade statement piece, professional fabrication in resin or metal is usually worth the cost.
Sizing and Placing 3D Wall Art the Right Way
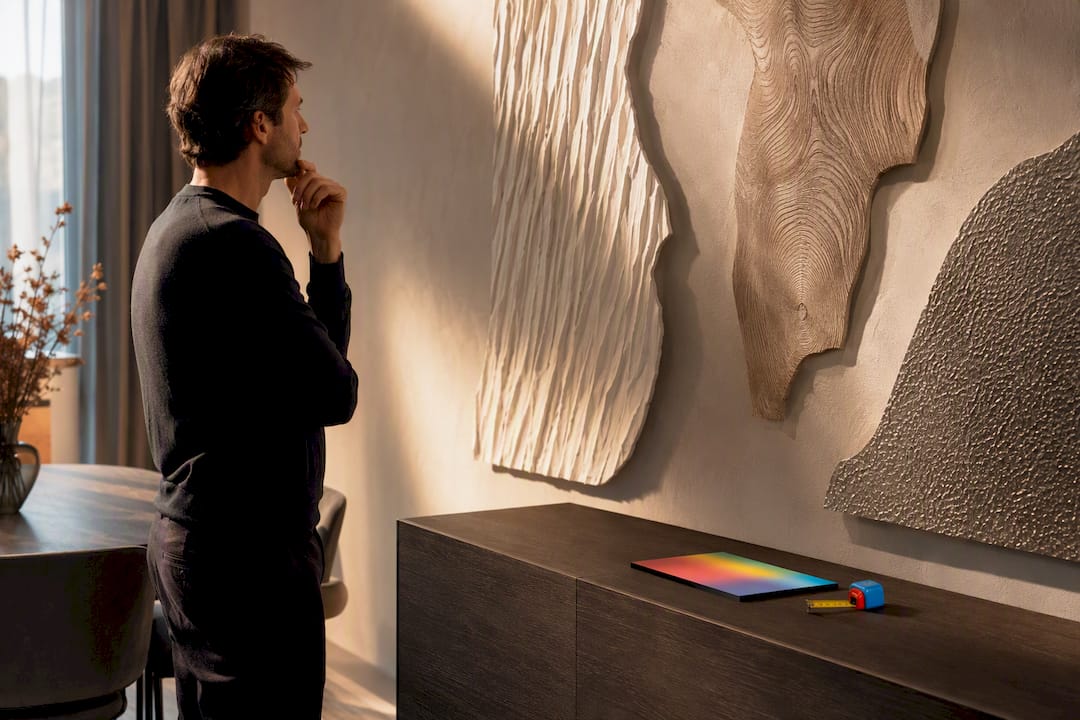
Scale is where most 3D wall art fails, either too small to register or so large it fights the room. For a sofa wall, aim for a piece roughly two-thirds the width of the sofa. Double-height entries or stair voids need much bigger pieces, often 8 feet or taller, to hold their own against the volume of space around them.
- Center the piece around 145 to 155 centimeters from the floor to the middle of the artwork, adjusting downward if it hangs above a seated area like a sofa.
- Deeper relief pieces read better from a distance; place them where viewers stand at least a few feet back.
- Matte walls hold shadow better than glossy ones, which changes how dramatic the relief effect looks.
- Any particularly heavy or wide piece in heavy material deserves a structural assessment before installation.
Pro Tip: Tape a paper cutout at the planned size and height for a day before committing. It’s the fastest way to catch a piece that’s the wrong scale for the wall.
Five Weekend-Friendly DIY 3D Wall Art Projects
DIY project ideas circulate widely because they’re genuinely doable. Pinterest’s collections alone show how much traction paper, foam, and mixed-media techniques get among home decorators. Here are five worth trying.
1. Layered paper relief panel. Materials: cardstock, foam spacers, frame. Cut 3 to 4 layers of a repeating shape, stagger them with foam dots, seal, and frame. Weekend project, beginner skill. Safety note: use a sharp blade and cutting mat.
2. Foam-core geometric tiles. Materials: foam core, craft paint, adhesive strips. Cut identical polygons, paint in a gradient, arrange in a honeycomb pattern. Half-day project.
3. Upcycled mixed-media collage. Materials: scrap fabric, wire, old hardware, glue gun. Build texture in sections before assembling on a backing board. One to two days.
4. Resin-coated driftwood assemblage. Materials: driftwood, epoxy resin, wood stain. Arrange wood on a backing panel, pour a thin resin coat for cohesion and shine. Requires ventilation; cure time adds a day.
5. Simple LED-backlit framed panel. Materials: shadow-box frame, translucent paper or acrylic, low-voltage LED strip. Cut a design into the front layer, mount LEDs behind, manage cords through a rear channel. Intermediate due to wiring.
Test finishes and mounting hardware on a small scrap before committing to the full piece. It saves you from redoing a project that looked right on paper but wrong on the wall.
Lighting and Finish Tips for Depth That Actually Reads
Flat overhead light flattens relief work; it erases the shadows that make dimensional art worth having. Angled spot lighting, positioned at roughly 30 degrees from the wall, throws the shadow lines that give depth pieces their punch. A fixture like an LED wall sconce works well for highlighting smaller relief pieces without washing them out.
- Diffuse ambient light suits large panels; concentrated spotlights suit smaller, deeply carved reliefs.
- Backlit panels typically run on low-voltage LED strips rated for household circuits, with cords routed through a rear channel or the wall itself.
- UV-reactive pieces look like ordinary paintings under normal light and reveal hidden patterns only under blacklight, so plan a dedicated UV fixture if that’s the effect you want.
- Choose warm white (around 2700K to 3000K) for wood and plaster; cooler tones suit metal and glass.
Pro Tip: If you’re testing a blacklight piece for the first time, view it in a fully darkened room before deciding on final placement. Ambient light bleed can mute the glow effect significantly.
Mounting, Weight Limits, and Everyday Maintenance
Hardware choice depends entirely on weight. Picture hooks handle light foam or paper pieces. French cleats and Z-bars distribute weight evenly for mid-range wood or resin panels. Anything heavy or wide needs anchors into studs or masonry, not drywall alone, and buyer’s guides consistently recommend professional installation once a piece crosses into metal-sculpture territory.
- Dust relief pieces with a soft brush weekly; deep-clean quarterly with a slightly damp cloth.
- Glass and acrylic panels need glass-safe cleaners only, never abrasive pads.
- Anything over roughly 40 pounds should hang from studs, not anchors alone.
- When removing a piece, mark hook positions with tape before taking it down so re-hanging is exact.
A Studio’s View on Commissioning Glow Art
Facundo Yebne, the award-winning artist behind FLY Miami Art, has spent years working with UV-reactive pigments in sculptural pop art, and one thing stands out: blacklight pieces behave completely differently depending on the room’s daytime light versus its evening light. A piece that reads as a simple pastel painting at noon can reveal a hidden pattern entirely under blacklight after dark.
When commissioning a glow piece, specify the wall dimensions, send photos of the space, and describe the glow intensity you want, subtle accent or full-room statement. That information shapes pigment choice and wiring needs before the piece is even started. Custom commissions differ from ready-made pieces mainly in this planning stage; ready-made work skips it entirely.
Where to Buy or Commission 3D Wall Art
Online studios and marketplaces are the fastest route to a finished piece. Studio sites, including FLY Miami Art’s wall art collection, sell original and limited-edition sculptural work directly, often with commission options for custom sizing or color. Specialty glass and LED art vendors sell turnkey backlit panels, which is worth knowing if you want luminous depth without wiring anything yourself.
Offline, local galleries and art fairs remain a solid source for one-of-a-kind sculptural pieces, especially if you want to see texture and scale in person before buying. Interior designers and architectural salvage shops sometimes carry vintage relief work or can point you toward fabricators for custom metal or plaster pieces. For large commercial installations, hotels and public spaces typically commission directly through an artist’s studio rather than a retail channel, since scale and site-specific design require back-and-forth that a marketplace listing can’t handle.
Whichever route you choose, ask about lead times. Finished LED and glass pieces often ship within a few business days, while custom commissions, especially anything involving UV pigment work or large-scale metal, can take considerably longer. Budget accordingly, and don’t assume a custom piece will arrive on the same timeline as an off-the-shelf panel.
What Actually Matters When You’re Choosing 3D Wall Art
Most advice on this topic obsesses over style, wood versus metal, abstract versus figurative, and skips the two things that actually determine whether a piece works: scale relative to the wall, and how the room’s light changes across the day. A gorgeous relief piece mounted too small looks like an afterthought. The same piece, sized to two-thirds the sofa width and lit at an angle, becomes the reason people walk into the room and stop talking.
The other place conventional advice falls short is UV-reactive work. It gets lumped in with novelty decor, something for a dorm room or a party. That undersells it. A well-made blacklight piece functions as two artworks in one wall, a quiet daytime painting and an entirely different nighttime experience, and that duality is genuinely rare in decor. The tradeoff is that it demands more planning: dedicated lighting, a room where you control ambient light, and clear communication with whoever makes it about intensity and viewing conditions.
If you’re deciding where to spend your effort, spend it on scale and lighting first. Material choice matters, but it’s forgiving. Poor scale and flat lighting will sink even a genuinely well-made piece.
— Facundo
Bring Studio-Grade Glow Art Into Your Own Space
Building a foam-tile wall or a paper relief panel yourself is satisfying, but some effects, especially UV-reactive pigment work that transforms under blacklight, are hard to replicate without studio experience. That’s the gap FLY Miami Art fills: original and limited-edition sculptural pieces built with UV-reactive materials, designed to look like one artwork in daylight and reveal an entirely different one after dark.
The UV glow art collection is built specifically for readers who want that dual-personality effect without guessing at pigment ratios or wiring their own blacklight fixture. For anyone drawn to sculptural statement pieces instead, the sculpture collection covers commission options for custom sizing and finish. If you know roughly where the piece will hang, send wall dimensions and a photo through the site and start a commission conversation today.
Sources
- 3D Art on the Wall: Transforming Spaces with Depth, Texture, and Style
- 3D wall art buyer’s guide: materials, scale and placement
- Cosmic Glow | LED Galaxy Wall Art | Interior Moderna
- Glowing in the Dark | Glass Wall Art – Artdesigna