10 Staircase Wall Art Ideas for Sloped Stairs With Templates
A diagonal gallery wall that follows the stair slope, or a single oversized vertical statement at the landing, is the fastest way to transform a staircase wall. Measure from the stair nosing, not the floor, and keep frames 4 to 6 inches apart. An artist well-versed in staircase wall design built this guide around that exact rule, plus one more: pick your visual anchor before you pick your frames.
TL;DR:
- Measure from the stair nosing and keep frames 4 to 6 inches apart, widening gaps gradually as you ascend to counter parallax.
- Use scaled paper templates to check sightlines from multiple points before drilling holes for your frames.
- Choose taller, vertical art pieces over wide ones to better suit the progressing view angles on a staircase.
- Lightweight gallery-wrapped canvases and acrylic glazing are safer options that reduce shattering risks on high-traffic stair walls.
- Opt for repositionable or adhesive hanging systems for renters, and always secure heavier pieces with hardware rated for the wall type and slope.
Table of Contents
- 10 Quick Staircase Wall Art Ideas to Try First
- Layout and Measurement Templates That Actually Work on Sloped Stairs
- Styles and Themes That Read Well While You’re Moving
- Materials, Frames, and Hardware: Safe, Practical Choices
- Renter-Friendly and Safety-Conscious Hanging Options
- Lighting and Placement to Maximize Impact and Reduce Glare
- Maintenance and Material Longevity: Keep Your Staircase Art Looking Fresh
- Why Handcrafted or Sculptural Pieces Can Elevate Staircases
- Color Coordination With Staircase and Adjacent Wall Colors
- Incorporating Three-Dimensional or Mixed-Media Art for Stair Walls
- Design Intent and Rotating Displays
- Find Handcrafted and UV-Reactive Pieces for Your Landing
- Sources
10 Quick Staircase Wall Art Ideas to Try First
Some of these you can finish in an afternoon. Others need a weekend and a laser level. Either way, start with the shape of your stairwell, not a Pinterest board.
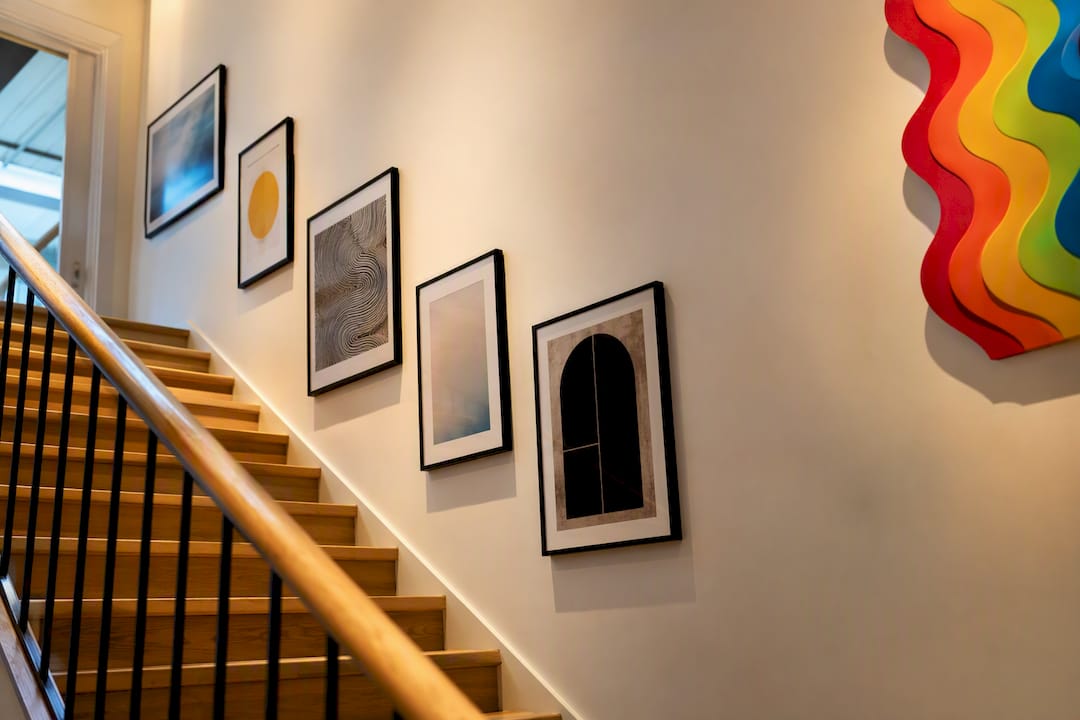
- Diagonal gallery wall. Best for long, straight runs. Follow the stair angle with your frame centers instead of fighting it.
- Single oversized vertical piece at the landing. One dramatic canvas does more than eight small ones ever will.
- Stepped triptych or vertical series. Three or five pieces climbing the run, culminating at the landing.
- Salon-style eclectic cluster. Mixed frame sizes and materials, unified by one palette or subject.
- Wallpaper or mural as backdrop. Skip frames entirely and let the wall itself be the art.
- Painted stripes or color blocking. Echo the banister’s angle in paint instead of frames.
- Wall-mounted sculptures or reliefs. Dimensional pieces that catch light differently at every step.
- Mirrors, clocks, and sculptural objects. Break up flat frames with something that has weight and shadow.
- Floating shelves or a narrow bookcase. Built into the stair wall for rotating objects, not just hung art.
- Peel-and-stick photo tiles or magnetic rail systems. The renter’s answer to a gallery wall, with zero holes.
Mix and match freely. A gallery wall built around mixed media often outperforms a pure photo wall because texture reads better from a distance than flat printed color.
Layout and Measurement Templates That Actually Work on Sloped Stairs
Stairs break the rules that work everywhere else in the house. A center line that looks perfect in a hallway will look crooked here, because you’re viewing the wall from a dozen different heights as you climb.
- Set your datum at the stair nosing, not the floor. Measure up from the edge of each step, aiming for a center line around 58 inches above the nosing, adjusted as needed for ceiling height and step depth.
- Space frames 4 to 6 inches apart as a baseline. Tight spacing of 3 to 4 inches reads as a dense, collected wall. Open it to 6 or 8 inches for something more minimal.
- Widen the gaps slightly as you ascend. Professionals use a ratio-based spacing approach on sloped walls, increasing spacing gradually to counter parallax, the way distant frames appear to shrink and drift closer together as your viewing angle changes on the way up.
- Cut paper templates to scale and tape them to the wall. Tracing each frame onto paper before you drill a single hole lets you check sightlines from the bottom step, the middle landing, and the top. Walk the stairs three times before you commit to a nail.
- Pick a frame-count combo that fits your run. Eight to twelve small frames (roughly 8x10 or 13x13) suit most standard staircases. One or two statement pieces in the 24x36 or 25x17 range work better on shorter runs or landings with limited wall height.
Pro Tip: Stand on the third step from the bottom and look up. If the top frame feels too small from there, it will look tiny from the entry hall too. Consider choosing larger frames to ensure good visibility.
For a deeper walkthrough of hanging sequences, this layout and hanging guide covers template cutting in more detail than most manufacturer instructions do.
Styles and Themes That Read Well While You’re Moving
A staircase is a moving target. Whatever you hang gets viewed from below, from the side, and from three feet away at the top. Pick a style that survives all three angles.
- Modern and minimal: consistent frame sizes, narrow black or white profiles, and a tight two or three color palette.
- Cozy farmhouse: mismatched wood frames, warm tones, and a few vintage finds mixed in for texture.
- Eclectic salon mix: wildly different sizes and frame styles, held together by one unifying palette or motif so the wall reads as intentional rather than thrown together.
- Monochrome or black-and-white: high contrast holds up even when you’re glancing at it mid-stride.
- Coastal, boho, or vintage-moody: great in entry stairwells with natural light, less forgiving in dim interior stairs.
- Pop-art or sculptural statement: one handcrafted or UV-reactive piece at the landing does the work of six framed prints, and it changes character depending on the time of day.
Because vertical pieces echo the wall’s height better than wide horizontal canvases, almost every style above leans taller rather than wider when applied to a stairwell.
Materials, Frames, and Hardware: Safe, Practical Choices
Glass and stairs don’t mix well. If a frame ever comes loose on a sloped, high-traffic wall, you want it to land soft, not shatter.
- Gallery-wrapped canvas is lighter and removes the breakage risk that glass carries if a piece ever falls, which makes it a smart default for stair walls specifically.
- Acrylic glazing over glass cuts glare and weight, though it can scratch more easily over time.
- Use stud screws or cleat systems wherever possible, not just drywall anchors, especially above the first few steps.
- Lock-in brackets and anti-tilt anchors matter more on stairs than anywhere else in the house, since a frame that shifts on a slope is more visible and more dangerous.
- Call a professional installer for anything sculptural, oversized, or over 15 pounds. This isn’t the wall to guess on.
- Choose low-VOC finishes and lightfast prints if the stairwell gets direct sun through a nearby window or skylight.
Pro Tip: If you’re mounting anything heavier than a standard framed print above the third step, use a stud finder and a laser level together. Eyeballing a stairwell is how frames end up visibly crooked from the entryway.
Renter-Friendly and Safety-Conscious Hanging Options
Not every staircase wall gets nails, and not every household wants the risk of a heavy frame near a flight of stairs.
- Repositionable photo tiles, adhesive strips, and magnetic rail systems let you swap pieces without patching a single hole.
- Adhesive alone won’t hold anything heavy. Once a piece crosses roughly 3 to 5 pounds, switch to mechanical fixings rated for the wall type.
- Secure the bottom corners of every frame, even light ones, with a small safety bracket so nothing tilts forward over a stairwell.
- Renters should check with a landlord first, confirm weight limits on shared or older walls, and keep spackle on hand for move-out patching.
Lighting and Placement to Maximize Impact and Reduce Glare
Light hits a staircase wall from constantly shifting angles as someone climbs, so a fixture that looks perfect from the bottom step can throw glare straight into someone’s eyes at the top.
- Aim adjustable track heads at roughly 30 degrees to each piece; this angle minimizes glare while keeping color accurate.
- Curved or spiral stairs do better with ceiling-mounted tracks rather than wall sconces, which cast uneven shadows on a curved surface.
- Battery-powered LED picture lights are the easiest fix if you don’t want to run new wiring.
- Keep light off the steps themselves. Aim fixtures at the art, not downward, so you’re not creating shadows that double as a trip hazard.
Maintenance and Material Longevity: Keep Your Staircase Art Looking Fresh
Stairwells often sit near entry doors, skylights, or HVAC vents, which means your art ages faster there than almost anywhere else in the house.
- Keep prints out of direct afternoon sun where possible; UV exposure fades pigment faster on paper than on canvas.
- Clean canvas with a dry microfiber cloth; acrylic glazing tolerates a damp cloth and mild glass cleaner.
- Check hardware twice a year. A quick tug test on every frame catches loosening screws before they become a problem.
- Avoid paper prints and delicate wood frames near HVAC vents or stairwells with humidity swings, since both warp faster in fluctuating conditions than canvas or metal.
Why Handcrafted or Sculptural Pieces Can Elevate Staircases
A flat print looks the same at 8 a.m. and 8 p.m. A sculptural or UV-reactive piece doesn’t. Under normal light it reads one way; under a blacklight or shifting evening light, hidden patterns and colors surface. Some pop art sculptures are built around exactly that kind of transformation, and sculptural, UV-reactive artwork tends to work best as a single focal anchor rather than scattered across several small pieces.
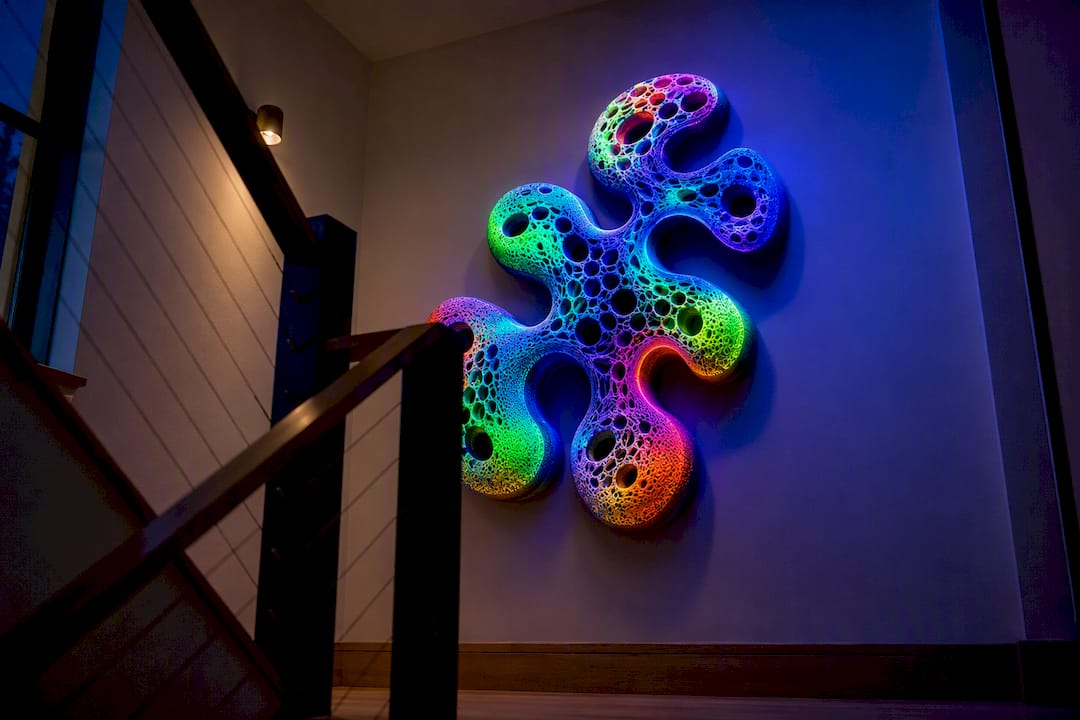
Landings are the natural home for this kind of work. The stairwell narrows a viewer’s sightline, so one striking dimensional piece at the top or turn of a run reads as a destination rather than clutter. Heavier sculptural pieces need professional mounting hardware rated for the wall type and slope, which is worth confirming before you commit to a spot.
Color Coordination With Staircase and Adjacent Wall Colors
Match your art’s palette to the wall behind it before you match it to the room at large. A stairwell almost always connects two or three different spaces visually, an entry, a hallway, sometimes an open landing, so the wall color you’re hanging against matters more than any single adjacent room.
On a neutral or white staircase wall, you have the most freedom. Bold color, high-contrast black-and-white work, and even a saturated pop-art piece all read cleanly against a blank backdrop. On a colored accent wall, pull one tone directly from the wall into your frames, mats, or a sculptural piece’s base color so the art looks anchored rather than randomly placed on top of a strong color.
Dark, moody stairwell colors, deep navy, charcoal, forest green, tend to make metallic frames and high-gloss finishes pop, while matte black frames practically disappear into the wall. If your staircase gets natural light from a nearby window, warm wood tones and cream mats soften the transition between wall and art. If it’s a dim interior stairwell, lean toward higher contrast pieces since low-light spaces flatten subtle color differences.
One practical trick: hold a paint chip or fabric swatch against your intended artwork before buying frames. Cameras and screens shift color temperature more than most people expect, and a piece that looked warm-toned online can read cool and mismatched once it’s on your actual wall.
Incorporating Three-Dimensional or Mixed-Media Art for Stair Walls
Flat art has a ceiling on how interesting it can be from a moving vantage point. Dimensional and mixed-media pieces don’t, because they cast real shadows that shift as the light changes throughout the day.
Wall-mounted sculptures, reliefs, and layered mixed-media pieces work especially well on stair walls because a viewer never sees them from just one angle. Someone climbing the stairs sees a sculptural piece from below, then level, then slightly above, each vantage point revealing a different edge or shadow. That’s an effect a flat print simply can’t produce.
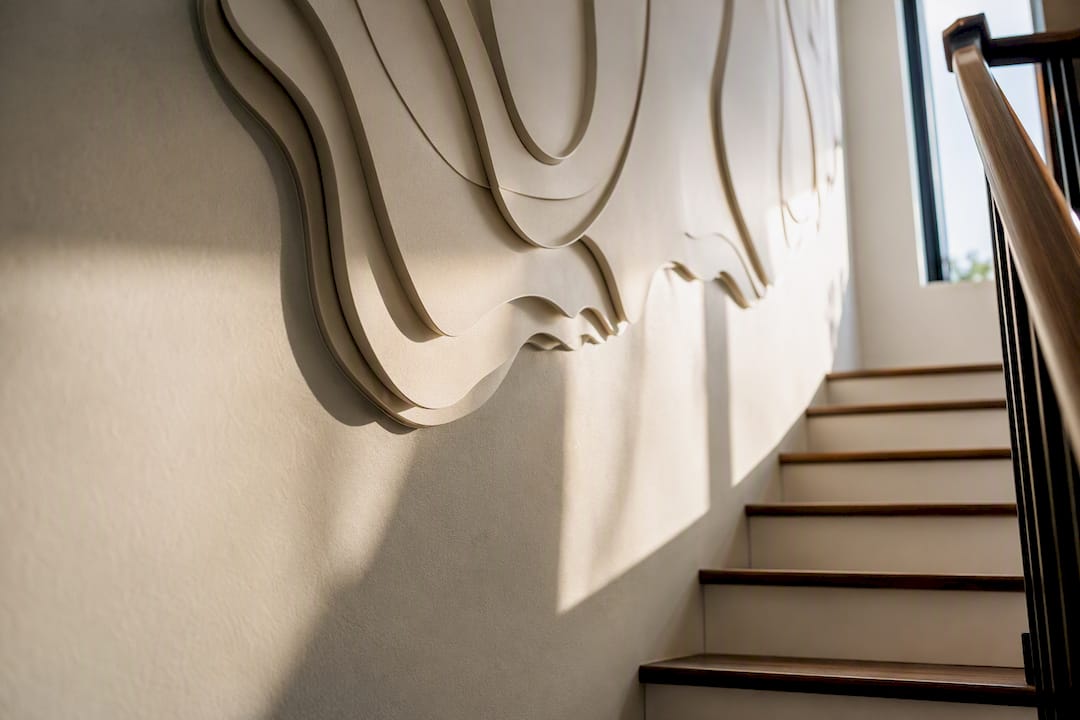
Weight and mounting are the real constraints here. A resin or mixed-material sculpture can weigh several times what a framed print does, so confirm the wall structure, stud placement, and hardware rating before hanging anything substantial. For lighter dimensional pieces, floating shelves work as a flexible middle ground, letting you swap sculptural objects, small vases, or framed pieces seasonally without repatching the wall.
Mixing textures also solves a common staircase problem: visual monotony on a long, uninterrupted run. A run of six identical framed prints can start to feel like wallpaper by the third step. Break it up with one textured or dimensional piece every few frames, a woven wall hanging, a small relief sculpture, a shadow box, and the whole wall reads as curated rather than repetitive.
Design Intent and Rotating Displays
Treat your staircase like a gallery that’s allowed to change. Before you hang anything, ask how often you actually want to swap pieces, who uses these stairs daily, and what mood you want at the top versus the bottom.
A rotation every season keeps a stairwell feeling intentional instead of stale. Rotating pop art displays at the landing, while keeping a stable gallery wall below, gives you one changeable focal point without redoing the whole run every few months.
— Facundo
Find Handcrafted and UV-Reactive Pieces for Your Landing
If you’re drawn to a stairwell centerpiece that changes character with the light, that’s a different shopping trip than picking out framed prints. Some artists offer wall art collections covering vertical canvases and statement prints, while sculpture collections can suit landings that can handle a dimensional, mounted piece.

For readers who want the effect described above, a piece that reads one way in daylight and reveals hidden color under blacklight, some UV Glow Art collections are built for this kind of transformation. Custom commissions may be available for specific sizes or mounting solutions for unusual stairwells.
Commissioning a custom piece typically starts with three details: the wall dimensions, the mounting surface (drywall, plaster, brick), and your target timeline. Getting those confirmed early avoids delays once the piece is ready to ship. Browse the current UV Glow Art collection to see what’s available now, or reach out through the site to discuss a commission sized specifically for your landing.
Sources
- Hallway and Staircase Gallery Wall Ideas That Actually Work – Smallwoods
- Guide to Arranging Art on Sloped Staircase Walls – MontCarta
- Staircase Wall Art: How to Size, Place and Hang It - Tiaracle
- 30 Staircase Wall Ideas You Never Thought to Try – The Spruce