30° Lighting Rules for Sculpture: CRI 90+, 120° Offsets for Collectors
Light sculptures with directional LED accents aimed near 30 degrees off vertical, using a main/fill/back hierarchy and fixtures rated CRI 90 or above. That combination models form without flattening it, keeps color true, and avoids the UV and infrared output that degrades pigments and patinas over time. LEDs handle all three jobs at once. The rest of this guide covers the geometry, fixture choices, and conservation limits that make the setup hold up in a real room or on a real lawn.
TL;DR:
- Proper sculpture lighting uses a main fixture set at approximately 30 degrees inclination to effectively model surface depth without distortion.
- A multi-light setup with fixtures spaced 120 degrees apart ensures balanced coverage and minimizes shadows that interfere with viewing angles.
- LED fixtures with CRI 90 or above are preferred for accurate color rendering and longevity, but their CRI rating should be tested on-site before installation.
- Outdoor fixtures require waterproof ratings like IP68 and regular maintenance checks to prevent water intrusion and fixture failure.
- Designing for at least two lighting states—ambient and UV reveal—helps reveal hidden details and enhances the viewer’s experience.
Table of Contents
- Why Sculpture Lighting Matters More Than People Think
- The Numbers Professionals Actually Use: Angles, CRI, and Lux
- Choosing Fixtures: Track Spots, Pedestal Lights, and Built-In Optics
- Indoor vs. Outdoor: Different Rules, Different Risks
- How to Set Up Sculpture Lighting Step by Step
- Balancing Visual Impact With Conservation
- What Facundo Yebne’s Studio Has Learned About Multi-State Lighting
- Fixing Common Sculpture Lighting Problems Fast
- Electrical Codes and Mounting Safety You Can’t Skip
- Light Is Part of the Sculpture, Not an Afterthought
- Commission a Sculpture Built for More Than One Lighting State
- Where These Numbers Come From
- Sources
Why Sculpture Lighting Matters More Than People Think
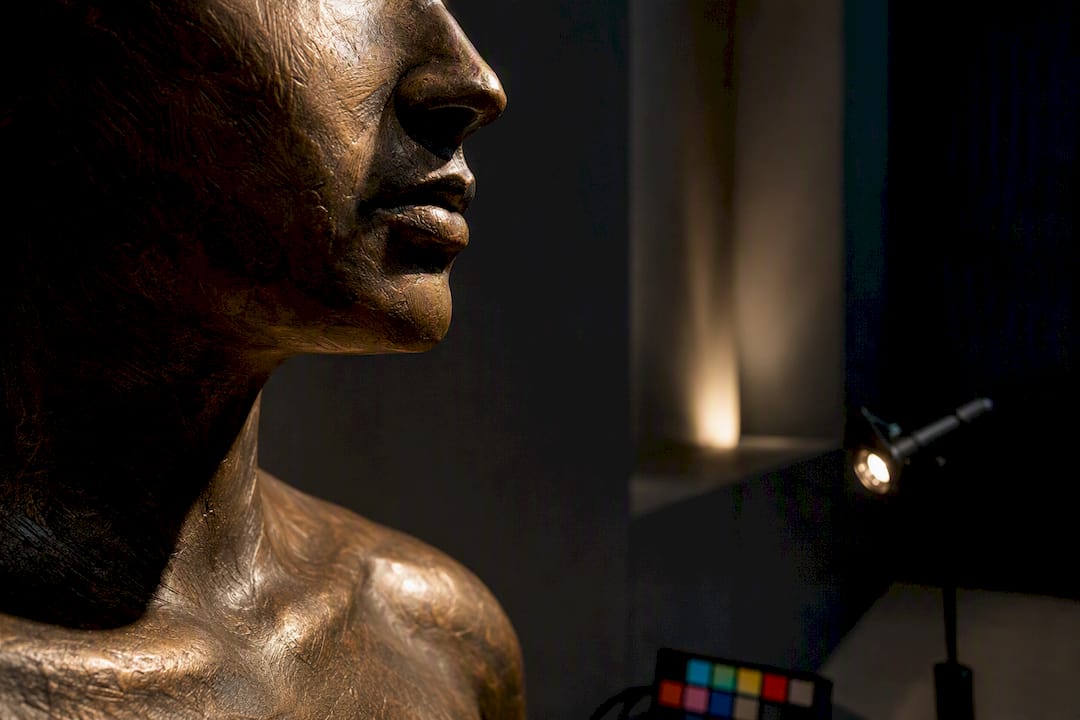
A sculpture is not a photograph. It has no fixed “front,” and the way light falls across its surface is what tells your eye where the form curves, recedes, or projects. Flat, even light kills that entirely. A bronze bust lit only by an overhead ceiling fixture reads as a gray lump, not a face, because there’s no shadow to define the cheekbone from the jaw.
Shadow does the sculpting your eye relies on. Cast a light from one dominant direction and the surface gains depth: highlights on the raised planes, shadow in the recesses, a gradient in between that your brain reads as three-dimensional form. Museums call this “modeling,” and it’s the single biggest reason directional accent lighting beats ambient room light for displaying three-dimensional art.
Beyond visibility, sculpture lighting has to balance a few competing goals:
- Accurate color so a patinated bronze doesn’t look green under the wrong bulb.
- Focal emphasis so the piece pulls attention away from the wall behind it.
- Preservation so the light doing all this work doesn’t quietly bleach or crack the material.
- Consistency across the times of day or year the piece will actually be seen.
That last point matters more outdoors, where sunlight competes with your fixtures for hours at a time. Indoors, in a controlled gallery or private collection, conservation usually wins the argument over drama. A engaging sculpture exhibition leans on restraint as much as brightness. Save the theatrical cross-lighting for pieces that can tolerate more exposure, and dial it back for anything fragile, aged, or made from light-sensitive materials.
The Numbers Professionals Actually Use: Angles, CRI, and Lux
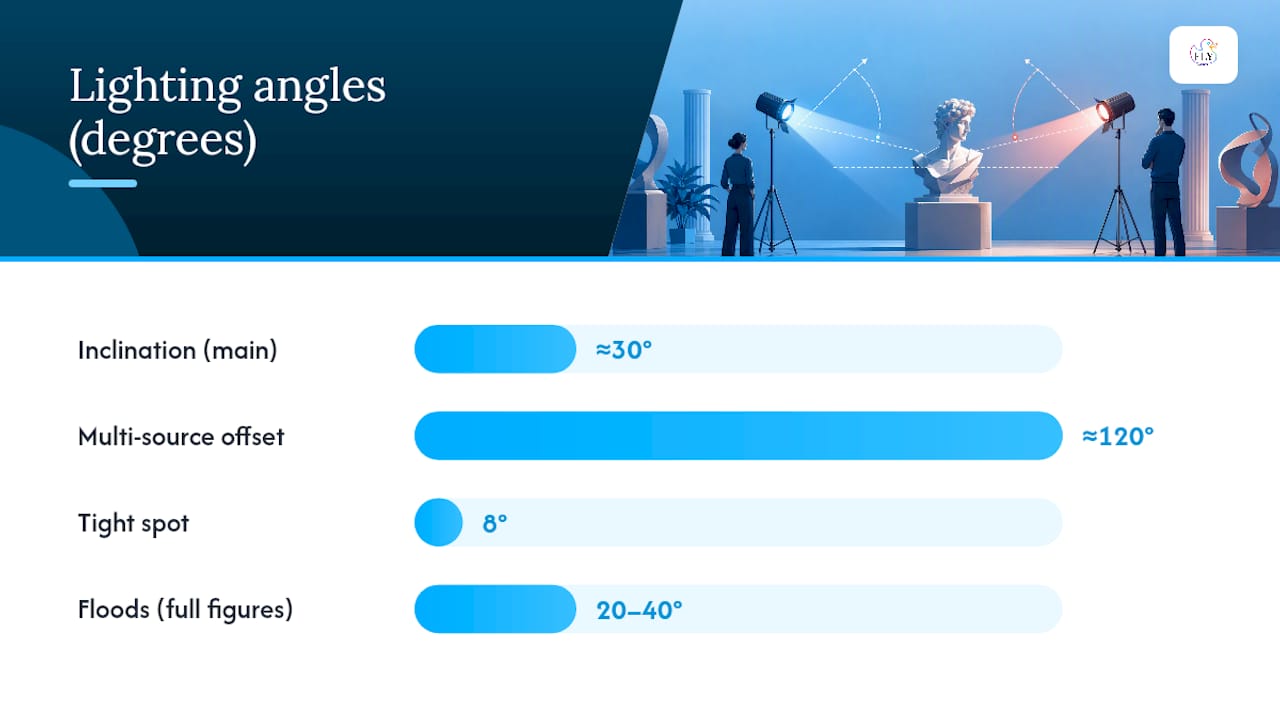
Most of the guesswork in sculpture lighting disappears once you know the standard numbers. ERCO’s lighting guidance recommends an inclination angle around 30 degrees from the piece for the main accent light. That angle produces strong enough shadow to model the surface without throwing shadows so long they distort the form.
When you’re lighting a piece from multiple sides, which most three-dimensional work needs, space three luminaires roughly 120 degrees apart. That offset gives balanced coverage around the sculpture and keeps a viewer standing anywhere from blocking the light with their own shadow.
Beam angle depends on scale. A tight 8 degree spot works for picking out a small detail, like a carved hand or an inset gem. Wider floods, in the 20 to 40 degree range, suit full figures or larger installations where you need even coverage across the whole surface rather than one hot point.
Color rendering matters as much as angle. LumenArt’s display lighting guidance sets CRI 90 as the baseline for any serious display lighting, with 95+ recommended when color accuracy is critical, on painted surfaces, mixed-media pieces, or anything where a client will judge color fidelity up close.
Pro Tip: Test your fixture’s actual CRI rating on-site before you commit to a full install. Manufacturer specs sometimes shift once dimmed, and a fixture that reads CRI 92 at full output can drop several points at 40 percent brightness.
| Parameter | Recommended range | Notes |
|---|---|---|
| Inclination angle | Around 30° | Main accent light on a single piece |
| Multi-source offset | ~120° apart | For three-point coverage on freestanding work |
| CRI | 90+ (95+ for color-critical work) | LumenArt guidance |
| Color temperature | 3000K to 4000K | Neutral viewing; use 2700K to 3000K for warm, classical materials |
| Beam angle | 8° to 40° | Narrower for small detail, wider for full figures |
Color temperature is a matter of material and mood. Cooler temperatures in the 3500K to 4000K range read as neutral and crisp, good for contemporary metal or glass work. Warmer temperatures around 2700K to 3000K flatter aged bronze, wood, and stone, the same way warm light flatters skin tone.
Choosing Fixtures: Track Spots, Pedestal Lights, and Built-In Optics
Adjustable track heads are the default choice for most collectors and gallery owners, and for good reason. You can reposition them as a piece moves or as a new acquisition arrives, retarget the beam without an electrician, and swap optics without touching the wiring. If your display rotates or your collection grows, track lighting is the flexible option.
Pedestal and showcase lighting solves a different problem: small objects on stands that need light close to the piece rather than from across a room. A dedicated downlight mounted directly above or angled from a nearby pedestal arm delivers tighter, more controlled beams than a ceiling-mounted spot ever could at that scale.
Integrated or built-in lighting, meaning fixtures designed into the base, plinth, or the sculpture itself, offers the cleanest look with zero visible hardware. The tradeoff is flexibility. Once it’s built in, you can’t easily retarget the beam if the piece gets repositioned, and repairs mean disassembling part of the display rather than swapping a bulb.
Matching optics to scale is where a lot of installs go wrong:
- Narrow spot (8° to 15°): small details, jewelry-scale objects, or single focal points on a larger work.
- Medium flood (20° to 30°): full figures, busts, and most freestanding pieces under six feet.
- Wide wash (40°+): large installations, wall reliefs, or when you want even coverage across a whole display alcove rather than a single hot point.
A common mistake is choosing one flood fixture for an entire large piece when it actually needs two or three narrower beams working together to build depth. One wide wash flattens everything it touches. Layering narrower beams, even at lower individual output, builds the same kind of dimension a museum lighting designer would aim for.
Indoor vs. Outdoor: Different Rules, Different Risks
Indoor lighting lives in a controlled environment. You choose the ambient level, the color temperature stays consistent all day, and the fixtures never see rain. Outdoor sculpture lighting fights a harder battle: shifting daylight, weather, and hardware that has to survive years of exposure.
Uplighting is the outdoor workhorse, just like effective balloon decor for outdoor events helps create stunning visual displays in open-air spaces. Ground-mounted fixtures angled up at a piece create dramatic shadow play that daylight rarely produces on its own, especially effective at dusk when ambient light fades but isn’t fully dark. Cross-lighting, placing two fixtures at roughly opposing angles, fills in the shadows uplighting alone can leave too harsh. Backlighting works well for silhouette-heavy pieces, rim-lighting an edge against a dark background.
Hardware durability isn’t optional outdoors. ERCO’s guidance on in-ground luminaires calls for IP68-rated fixtures and longitudinally watertight connection cables for anything recessed into the ground. Skip that spec and you’re looking at humidity working its way into the cable every time the fixture cools after dark, a slow failure mode that shows up as flickering months later, not immediately.
Materials respond differently to the same light source:
- Stone scatters light softly and tolerates higher intensity without visual harshness.
- Polished bronze and steel reflect specular highlights that can blow out into glare if the angle is wrong.
- Patinated bronze shows color shift under warm versus cool temperatures more than most materials.
Maintenance outdoors means checking seals and connections on a schedule, not just replacing bulbs when they fail. A fixture that looks fine can already have water intrusion working on the electronics inside.
How to Set Up Sculpture Lighting Step by Step
Getting the geometry right before you touch dimmer settings saves hours of second-guessing later. Work through it in this order.
-
Survey the viewing zone. Stand where visitors actually will, not where you assume they will. Note the primary sightline and any secondary angles people naturally walk to. This determines where shadows need to fall and where they absolutely cannot.
-
Place the main light first. Position it at roughly the 30 degree inclination ERCO recommends, aimed from the direction that best reveals the piece’s dominant form. This single fixture does most of the modeling work.
-
Add fill and back lights using the 120-degree spacing. Fill softens the shadow the main light creates without erasing it. Back light separates the piece from its background and adds a rim of definition along the far edge.
-
Choose optics for the piece’s scale, narrow spot for detail work, medium flood for full figures, and set fixture distance so the beam edge doesn’t fall short of or spill past the sculpture’s silhouette.
-
Set relative intensity. A useful starting ratio, drawn from gallery accent lighting practice, runs the primary accent light at roughly three times ambient level, with fill and back lights dimmed further below that.
-
Walk the room and check for glare. Stand at each identified viewing angle and look for hot reflections, especially on polished or glass surfaces. Re-aim before you finalize anything.
-
Check for observer shadows. If a visitor standing in the primary viewing zone casts their own shadow onto the piece, the main light is positioned too low or too close to the sightline.
-
Verify color consistency across all fixtures. Mixed color temperatures between main and fill lights create a visible split down the middle of the piece, a common and easily missed error.
-
Take a lux reading at the sculpture’s surface and confirm it falls within the range appropriate for the material before calling the install finished.
Pro Tip: Do the glare and shadow checks at the time of day the piece will most often be viewed. A setup that looks perfect at noon can develop harsh new shadows once evening interior lighting shifts the ambient balance in the room.
Balancing Visual Impact With Conservation
LEDs have become the standard for displaying sculpture largely because they solve the preservation problem other light sources create. Boca Lighting’s guidance on accent fixtures points to LED’s negligible UV and infrared output, low heat generation, and lifespan around 50,000 hours as the reasons museums and serious collectors have moved almost entirely to LED for display purposes. Older halogen and incandescent sources threw off heat and UV that quietly accelerated fading and material stress.
LED fixtures often have a long rated life enabling many years of operation before replacement, providing a maintenance advantage across large collections.
Lux limits vary by material sensitivity, and conservation guidance from NEDCC recommends lower exposure ceilings for light-sensitive materials, organic pigments, textiles, certain painted surfaces, and higher tolerance for resilient materials like stone, most metals, and glass. The practical takeaway: know what your piece is made of before you decide how bright to run the display.
A few habits keep exposure in check over time:
- Use diffusers or filters on any fixture close enough to concentrate heat or light on one surface point.
- Take a lux reading at install and re-check it annually, fixtures drift as they age or get bumped out of position.
- Log dimmer settings so you can restore the original balance after maintenance work.
- Rotate or reduce exposure on pieces displayed for extended runs, particularly organic or painted materials.
What Facundo Yebne’s Studio Has Learned About Multi-State Lighting
Contemporary UV-reactive sculpture adds a layer that traditional lighting guides rarely address: the piece is designed to look completely different under two separate light sources. A rubber duck sculpture under standard gallery light might read as playful pop art. Switch to blacklight, and hidden patterns and colors emerge that were invisible a moment before.
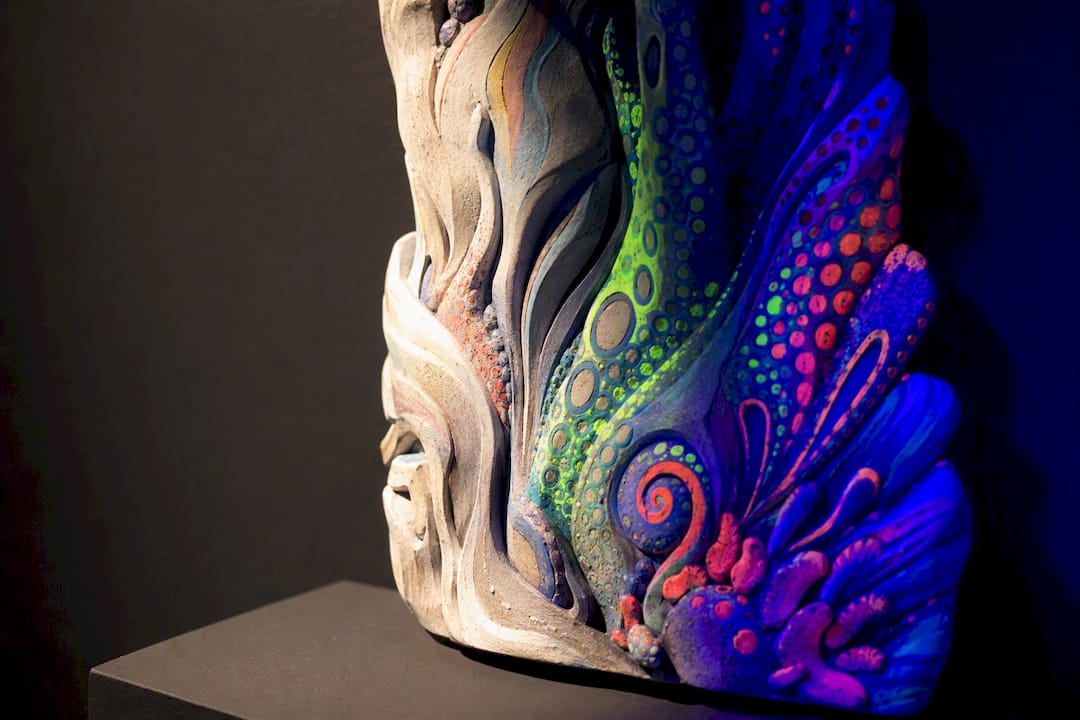
That reveal only works if the lighting plan accounts for both states from the start, not as an afterthought bolted onto a finished install. Fixture choice, control zoning, and even fixture placement all need to support a clean transition between ambient viewing and the UV reveal without one state’s hardware interfering with the other’s beam path.
A few things matter most for pieces built this way:
- Plan the ambient lighting layout first, then design the UV fixtures as a separate, independently controlled zone.
- Keep UV sources positioned so they don’t wash into the ambient beam path and dull the primary display.
- Coordinate directly with the artist or studio before finalizing fixture positions. The studio process behind glow-in-the-dark work shows how deliberately these reveals get engineered into the piece itself.
- For installations in lobbies or public spaces, budget for two full lighting states rather than treating the blacklight mode as a bonus feature.
Fixing Common Sculpture Lighting Problems Fast
Most sculpture lighting complaints trace back to one of four issues, and each has a quick diagnostic path.
Glare and reflection on polished surfaces usually means the fixture angle is too direct relative to the viewing position. Re-aim first. If that doesn’t solve it, add a snoot or baffle to narrow the beam’s spread, or shift the primary viewing angle slightly.
Hot spots or uneven coverage point to a beam angle mismatched to the piece’s scale. Widen the beam, pull the fixture back to spread the light further, or add a secondary fill light to even out the gradient.
Flat, texture-less surfaces almost always mean too much light from too many directions has canceled out the shadow that was doing the modeling work. Cut a source, or drop the fill light’s intensity relative to the main.
Outdoor failures, flickering, dimming, or dead fixtures, start with the IP rating and cable seals. Water intrusion is the most common cause and it rarely announces itself before the fixture actually fails.
Electrical Codes and Mounting Safety You Can’t Skip
Sculpture lighting installs, especially outdoor or in-ground fixtures, fall under the same electrical code requirements as any other permanent wiring. Any circuit feeding outdoor fixtures needs ground-fault protection, and wiring run underground or through wet locations needs conduit rated for that exposure. Skipping this isn’t just a code violation, it’s a real shock and fire risk once moisture inevitably works its way toward exposed connections.
Fixture mounting matters as much as the wiring behind it. A track head or pedestal light aimed at a heavy bronze or stone piece needs hardware rated for the mounting surface, whether that’s drywall, masonry, or a wood plinth. Undersized anchors are a common failure point, especially for track systems that get repositioned repeatedly over the years as a collection changes.
For anything permanently wired, whether indoors in a gallery or outdoors on a lawn, hire a licensed electrician for the connection work even if you’re comfortable aiming and adjusting the fixtures yourself. Local codes vary, and a professional catches issues like undersized circuits or improper grounding before they become expensive problems.
A few habits reduce risk across any install:
- Confirm outdoor circuits have ground-fault circuit interrupter protection before energizing anything.
- Use conduit rated for wet or underground locations on any buried cable run.
- Match mounting hardware to both the fixture weight and the wall or plinth material.
- Schedule a periodic inspection of connections and seals, particularly for outdoor installs exposed to seasonal weather swings.
Light Is Part of the Sculpture, Not an Afterthought
Every piece I design gets built with a specific relationship to light already baked into the surface, the depth of a carved line, the reflectivity of a coating, the way a shadow is meant to fall at a certain hour. Lighting decisions made after the fact, by someone who never saw the original intent, tend to flatten exactly the details that took the longest to get right.
If a piece can support it, plan for at least two lighting states rather than one: a baseline ambient mode for everyday viewing, and a secondary reveal mode, blacklight, dimmed accent, whatever the work calls for, that shows a different layer of the piece. Most collectors never think to ask for this until they see it done once.
For commissioned work, talk to an artist before the lighting plan is finalized. It’s the difference between displaying a sculpture and actually finishing it.
— Facundo
Commission a Sculpture Built for More Than One Lighting State
Some artists design pieces around the lighting problem this guide just walked through, rather than leaving it for someone else to solve after delivery. Commissioned or limited-edition pieces can factor in how they read under ambient light and how they transform under UV, so you’re not retrofitting a reveal effect onto a sculpture that was never built for one.

Browse the sculpture collection for examples of pieces engineered for multi-state display, or explore the UV glow art collection to see how blacklight reveals work across different sizes and formats. If you’re planning a lobby, gallery, or public installation and want the lighting plan built in from the start rather than bolted on later, the studio process page walks through how commissions come together, and it’s the fastest way to start a conversation about a custom piece designed for your specific space.
Where These Numbers Come From
The technical guidance in this piece draws on a handful of sources worth bookmarking if you’re specifying lighting for a real installation.
- ERCO’s lighting studies for the 30 degree inclination angle, 120 degree multi-luminaire offset, and outdoor fixture durability standards.
- Museums and Heritage Advisor for practitioner perspective on restraint, shadow, and artist consultation.
- NEDCC’s preservation leaflets for lux limits and light-damage prevention across material types.
- Boca Lighting and LumenArt for LED performance data and CRI/color temperature standards used in professional display lighting.
- Energy for baseline LED efficiency guidance relevant to long-term maintenance planning.
Sources
- Light for sculptures - Light studies - Planning light | ERCO
- Boca Lighting: accent lighting and LED guidance
- NEDCC: Protection from light damage (preservation leaflet)
- Lighting Life: Art Lighting & Sculpture – Museums and Heritage Advisor