Blacklight Exhibition Lighting for Galleries: 365 nm and UV Safety
For exhibition work, 365 nm-tuned LED fixtures are the professional standard: they produce the brightest fluorescence from UV-reactive paint, pigment, and fiber while keeping visible purple spill to a minimum. Typical choices are long-throw spot cubes or framing projectors, both prized for controllable output. The trade-off to manage is conservation: measure lux at the artwork and cap cumulative UV exposure, following IES and museum-practice guidance.
TL;DR:
- Choose narrowband 365 nm fixtures for clean fluorescence; 395 nm units cost less but cast more purple light and produce softer detail.
- Use long throw cubes or spot projectors for high ceilings and deep rooms, compact cubes near artwork, and bars for broad ambient glow.
- At a throw distance of 10 feet, a 31 degree beam covers roughly 5.5 feet across, so calculate spacing and test gobos before permanent mounting.
- Measure lux at the artwork and target 30 to 100 lux; use timers and low leakage LEDs because cumulative exposure rises with intensity and runtime.
Table of Contents
- Which blacklight fixtures work best for exhibitions?
- Why 365 nm is the professional standard for exhibition UV
- Shaping the beam: gobos, mounting, and throw math
- How much UV exposure is safe for UV-reactive art?
- A commissioning checklist for your blacklight installation
- How we approach blacklight staging at FLY Miami Art
- Immersive black-box or integrated glow: a curator’s call
- Commission a glowing piece instead of building your own rig
- FAQ
- Sources
Which blacklight fixtures work best for exhibitions?
The right fixture depends on your room size, mounting constraints, and how far the light needs to travel to reach the art.
Long-throw cubes and spot-style projectors suit wall-mounted UV-reactive paintings in galleries with higher ceilings or deep rooms, since they hold a tight beam over distance without losing intensity. Compact UV cubes, like the models Rosco builds for theme parks and museums, fit track or soffit mounting where you need a clean, low-profile install close to the piece. Strip lights and bars work well for ambient glow across a wall or alcove rather than a single focal point, while handheld UV wands are better suited to close-up documentation or photography than to full-room display.
When comparing fixtures, look past the marketing copy and check the actual specs:
- Peak wavelength in nanometers, since this determines fluorescence brightness and spill.
- Output, listed as mW or μW per lumen, which tells you how strong the UV emission actually is.
- Beam angle, which sets how tight or wide the coverage will be at your mounting distance.
- Dimming and control compatibility, so the fixture works with your existing lighting system.
- IP rating, especially for outdoor or high-humidity installations.
- Mounting accessories, including yokes, clamps, and track adapters.
A cube built for a 12-foot throw behaves very differently from a bar meant to sit two feet from the surface, so match the fixture class to your room before comparing brands.
Why 365 nm is the professional standard for exhibition UV
Peak wavelength is the single spec that matters most for how your display looks. Narrowband 365 nm fixtures, sometimes called “true UV,” excite fluorescent pigments strongly while emitting very little visible violet light, so the glow reads clean against a dark room. Near-UV 395 nm fixtures, more common in blacklight party lights, produce a noticeably more visible purple cast and generally weaker fluorescence on fine art pigments.

The Miro Cube 2 UV365 is built around a narrow 365 nm peak with a native 31-degree beam, a spec sheet that illustrates what professional exhibition fixtures look like when manufacturers optimize for fluorescence over visible spill.
For budget builds or short-term rentals, 395 nm fixtures are sometimes accepted since they cost less and are widely available, but expect a more visible purple wash and softer glow on detailed UV-reactive work.
Shaping the beam: gobos, mounting, and throw math
Getting the glow to land exactly where you want it is mostly about beam control, not fixture power.
Start with throw distance and beam angle to estimate your beam diameter: diameter equals twice the throw distance multiplied by the tangent of half the beam angle. A fixture with a 31-degree beam angle mounted 10 feet from the wall produces a beam roughly 5.5 feet across, so size your fixture spacing accordingly for even coverage across a wider piece.
- Calculate throw and beam diameter before buying fixtures, not after mounting them.
- Add a gobo or patterned lens when you want to project a shape, message, or texture onto fluorescent scenery rather than a plain wash.
- Use a snoot or framing shutter to crop the beam tightly around a canvas edge and avoid spill onto adjacent walls.
- Choose your mounting hardware, track for galleries with existing rail systems, clamps for temporary installs, recessed cans for permanent builds.
Steel or glass gobos let you project custom patterns, including hidden messages that only reveal themselves under UV, a technique worth testing on sample material before committing to final hardware. For sharp, clean projected patterns at longer throws, the specs in this gobo lighting guide translate directly to exhibition work even though it was written for event venues.
Pro Tip: Mock up your beam angle and gobo pattern on a test swatch under house lights off before installing permanently, then adjust with black drapes or flags to kill ambient bounce and boost contrast.
How much UV exposure is safe for UV-reactive art?
Conservation science follows a simple rule: damage scales with intensity multiplied by time, known as the reciprocity principle. That means a dim fixture left running for months can do as much cumulative harm as a bright one running for days, so duration matters as much as brightness.
Limiting cumulative UV dose, not just peak intensity, is the practical takeaway from reciprocity studies on light exposure and fading.
Practical exposure guidance for UV-reactive pigment generally falls in the 30 to 100 lux range, measured at the artwork surface rather than at the fixture. Lux multiplied by display hours gives you a running exposure budget you can track over a show’s run.
To keep exposure in check:
- Measure lux at the artwork, not at the fixture housing, using a handheld meter.
- Choose LEDs with low UV leakage outside the intended peak wavelength.
- Add filters where a fixture’s spec sheet shows unwanted secondary emission.
- Limit display runtime on timers rather than leaving fixtures on continuously.
The IES white paper on ultraviolet germicidal irradiation distinguishes germicidal UV from exhibition lighting and is a useful reference point even though its primary focus is disinfection rather than display, since both share mitigation logic around minimizing unnecessary dose.
A commissioning checklist for your blacklight installation
Treat your first install as a test, not a final setup. A short mock-up phase catches problems that are expensive to fix once fixtures are permanently mounted.
- Mock up the layout with one or two fixtures before buying a full set, checking beam reach against your actual wall dimensions.
- Measure fluorescence and lux at the artwork surface using a lux meter, adjusting fixture distance until you’re inside your target range.
- Refine aim and beam shaping with gobos, snoots, or framing shutters once placement is confirmed.
- Set dimming presets and runtime limits so the display defaults to a conservation-safe level outside peak viewing hours.
For control systems, DMX suits galleries that want dynamic scene changes during an opening or event, while DALI-2 or Casambi fit permanent installations where you want a steady, repeatable illuminance level with less day-to-day adjustment. Automated schedules that dim or shut off fixtures outside visiting hours cut cumulative exposure without any staff intervention.
Keep a basic toolkit on hand: a handheld UV radiometer, a lux meter, black drapes for contrast control, a stable ladder, spare gobo slides, and sample paint swatches for testing fixture output before it touches a finished piece. Our 5-step lighting plan with UV imaging walks through this same sequence in more detail for collectors setting up a first display.
How we approach blacklight staging at FLY Miami Art
We build our UV/Glow Art pieces to read clearly in a range recommended for collectors, which shapes how we select fixtures and plan placement for every commission. When we stage an installation, we mock up fixture position first, set dimming presets for both daytime and event lighting, and cap runtime to stay within a safe cumulative exposure budget. Our guide on blacklight interior design that lasts covers the same preservation logic we apply to our own work, and our notes on 30 to 100 lux care go deeper on why that range holds up over years of display.
Immersive black-box or integrated glow: a curator’s call
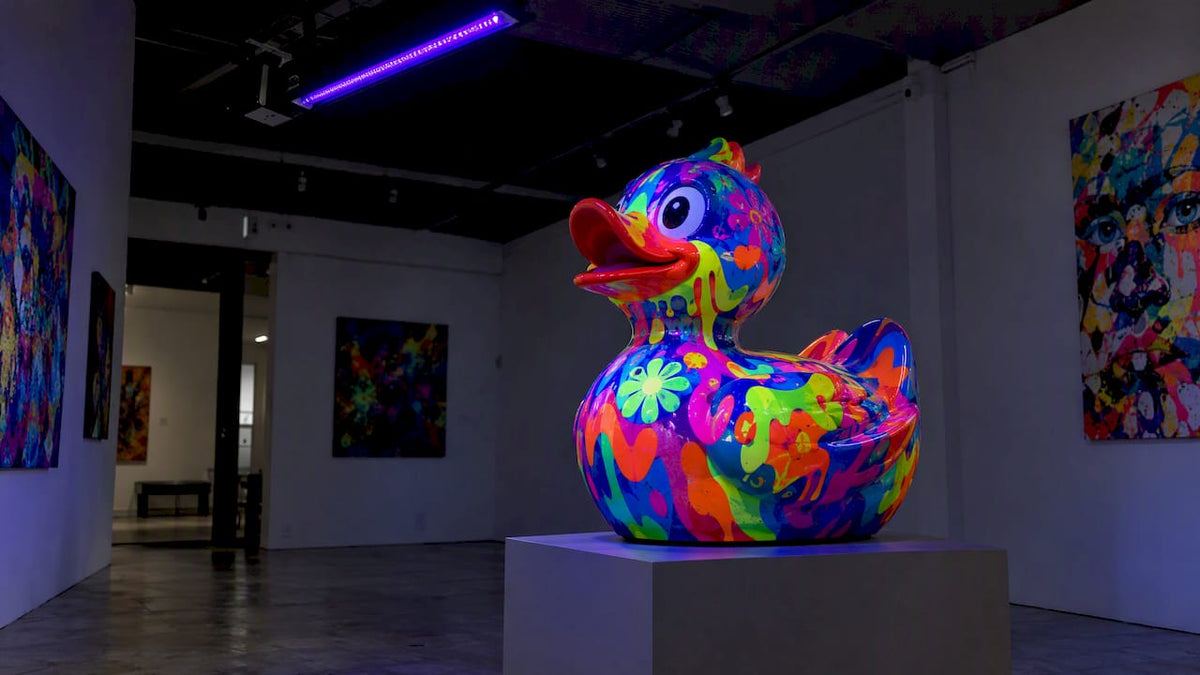
A tightly framed black-box room with minimal ambient light suits dramatic, high-contrast reveals where the glow is the point. Integrated glow, lower output, wider beam, coordinated with daylight, fits spaces where the art shares the room with other activity. Weigh how much drama you want against how much daylight exposure the piece will tolerate over time.
— Facundo
Commission a glowing piece instead of building your own rig
If spec sheets and throw math aren’t how you want to spend your week, we offer a more direct route: commission original UV-reactive artwork built to glow correctly from the start. Our custom glow piece option and full UV/Glow Art collection give venues, collectors, and event planners a finished piece calibrated for display rather than a fixture plan to assemble.
| Option | Best for | Where to start |
|---|---|---|
| Custom glow piece | Site-specific commissions for venues or collectors | Flymiami |
| UV/Glow Art collection | Ready-to-install UV-reactive originals | Flymiami |
| Full commission inquiry | Hotels, brands, and public installations | Flymiami |
Start a commission conversation at Flymiami.
FAQ
What wavelength is best for exhibition blacklight fixtures?
Narrowband 365 nm LED fixtures are the professional standard because they produce strong fluorescence on UV-reactive pigment with minimal visible purple spill. Near-UV 395 nm fixtures are more common and cheaper but tend to show a more visible violet cast.
How bright should blacklight be for displaying UV-reactive art?
A practical target is 30 to 100 lux measured at the artwork surface, a range we use for our own UV-reactive work. Staying within that band helps balance visible glow against cumulative light damage over a show’s run.
Can blacklight damage artwork over time?
Yes, because UV exposure follows a reciprocity rule where damage scales with intensity multiplied by time, so even low-level exposure accumulates with long display hours. Limiting runtime, using filtered or low-leakage LED fixtures, and measuring lux regularly all help manage that risk.
What fixtures do professional exhibitions use for blacklight?
Compact, narrowband cube fixtures like the Miro Cube 2 UV365 and the Pica Cube UV are built specifically for museum, theme park, and stage use, with lens sets and dimming control for shaping the beam. Both are tuned near 365 nm, which is the wavelength professional installers look for.
Is UV imaging used for anything besides display lighting?
Ultraviolet fluorescence imaging is also a nondestructive tool conservators use to examine artworks, often with 365 nm LED sources similar to those used in exhibition lighting. It can reveal underlying layers, repairs, or material composition without touching the piece.
Sources
- Miro Cube® 2 UV365 | Rosco (US)
- Three-Dimensional Ultraviolet Fluorescence Imaging in Cultural Heritage: A Review of Applications in Multi-Material Artworks - PMC
- Pica Cube™ UV | Rosco (EMEA product page)